|
|
|
Cleaning Photos with Adobe Photoshop
Now we are assuming you have scanned your photo / photos into your computer.
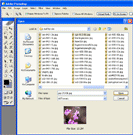
First thing is we need to load our scanned photo into Photoshop. To do this click on
File and then Open at the top of photoshop.
Example:
Now you need to search for your photo. Once you find where you saved it, then select the file and hit open.
Example:
Now you have your photo opened in photoshop and we can start to clean it up.
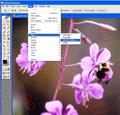
We will want to select from the menu above Filter and then go down to Noise and then Dust & Scratches...
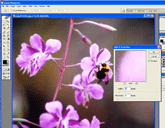
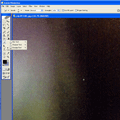
Now your probably wondering what are we cleaning. You will notice in the
example below some dust particles that show up as white specs when you scan
your photo into your computer. We are going to fix those right now so you
have a nice clean photo to share with others.
Example:
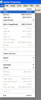
Now you will get a box that will open and you can select Radius and Threshold
to remove the dust and scratches. You will want to make sure NOT to go to
high on these other wise you will loose your photos sharpness. You will
notice that the photo will slowly loose a little sharpness when you do this
to begin with. That's a good sign that you are right in the perfect area
to remove most all the dust and scratches. You will notice that I selected
6 pixels on the radius and 8 levels on the threshold. Not every picture
will need this much cleaning, so it will very from photo to photo. But I
try not to go much higher than this, otherwise the sharpness will be lost
in your photo. After you get it to that point hit the OK button and it will
start to clean it for you. Here is an example below.
Example:
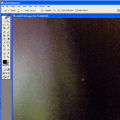
Now you might notice that the photo might still have a white spec or two
that didn't completely clean off. Well we don't want to run the step above
again other wise we will loose the sharpness of our photo. So locate any
of these white spots that might be left and zoom in on them 4 to 5 times
the original size. To locate the zoom button, you will find it on the left
side of the screen in the side menu. It will look like a magnify glass.
Example below.
Example:

Next we want to select from the left side of the menu, your smudge tool. You can select what brush size above, I like to use a small brush, so
I will select a number 10 size brush. I also like to keep the brush set on Normal and I like to use a Strength of about 60%. Sometimes I will
go as high as 75% but no more than that. See the example below.
Example:
Now I will start to brush across the white specs in the picture. Make sure
your still zoomed in. This will help fix it up really nice. Here's kind
of what it will look like as you start to smudge it. I like to go back in
forth and up and down to slowly dissolve the white specs. Remember not to
start to smudge the colors to far away from the white specs. You want to
stay close to the specs but enough distance to pull some of the color from
the surrounding areas into the white specs. When your finished your photo
will look great. See example below.
Example:
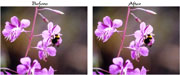
Now you can zoom back out using the magnify glass tool on the left side again, and your photo will look great.
You can see the before and after photo below.
Example:
If your looking to buy photoshop or just look into learning more about it,
visit
http://www.adobe.com/products/photoshop/
Adobe® Photoshop® is a Registered Trademark
^ Return to Top ^
|
|
|


